Hundreds of fragile natural elements held in fused soft plastic circles. The circle represents the eternal circle of life, unity, nature. Also reuse, recycling, repurposing. The light shining through the clear discs highlights the captured beauty within. A few pieces have decomposed leaving traces, a reminder of the natural cycle of life and death. Whilst the durable, unnatural plastic prompts thoughts of global issues around plastic use and disposal.
The centre of the banner holds a collection of site-specific found poems, each referring to a ///what3words location in the Bayfield Hall Lake.

Whilst studying with the Open College of the Arts I experimented with fusing soft plastic food packaging waste by ironing it. This creates a fabric like material, that can be worked with more easily through cutting, folding and stitching. In March 2024 I used sheets of this to run a well received drop-in workshop at Deepdale Hygge on the North Norfolk coast. We created collages, cards and simple stitched wallets throughout the day.
I have long been an admirer of the artist Susie Freeman. Susie developed a textiles technique to trap, or encapsulate, objects within knitted pockets. She goes on to use these to create fabric for elaborate gowns, beautiful mosaics and more. Inspired by her work I started experimenting with trapping things between the layers of plastic I was joining. Starting with snippets of threads saved from other projects and trimmings of wool from pom pom making before moving on to plants, where I seem to have stuck for the moment. There is definitely more I want to try, further experimentation. I have currently been trapping flat things, things that can be ironed in the fusing process. I'm sure with some more precisely applied heat the edges of the plastic could be fused to trap more 3D objects within.
Experimentation is a vital part of my creative process but so is having an end goal in mind and a reason to create something. The idea of a patchwork of these encapsulated pieces of nature started to form in my mind. The patchwork pieces were inevitably circular. I seem drawn to circles in everything I do at the moment - the circle has no beginning or end, a reminder of the eternal circle of life, of interconnection, of unity, of nature. The circle is also representative of reuse, recycling, repurposing. The shape is fitting for both my use of natural objects and my re-purposing of waste plastics. As I am keen for my work to be displayed outdoors in a natural environment where possible I made a test piece and hung it in my garden to check if the plastic would stay fused and how much the objects would deteriorate. On the basis of this I submitted the plan to make a larger piece, incorporating text, for the Bayfield Hall Sculpture Trail taking place in Autumn 2024. Once I found out the work had been accepted I got to gathering, writing, fusing, cutting and stitching.

Keep reading if you'd like to have a go at making your own fused plastic patchwork, or are interested in my process.
Step 1 - Gather
I went out gathering suitable pieces of nature from the streets, parks and woodlands near my home. Mainly gathering fallen or dead objects and taking only a few growing leaves or flowers from each spot. Whilst collecting I considered the size, shape and squishability to think about whether or not they would be suitable. I also tried to make sure things were fairly dry, I had previously trapped some petals which looked really beautiful at the time but dissolved into liquid mush after a week or two! Once home I snipped and sorted my findings.


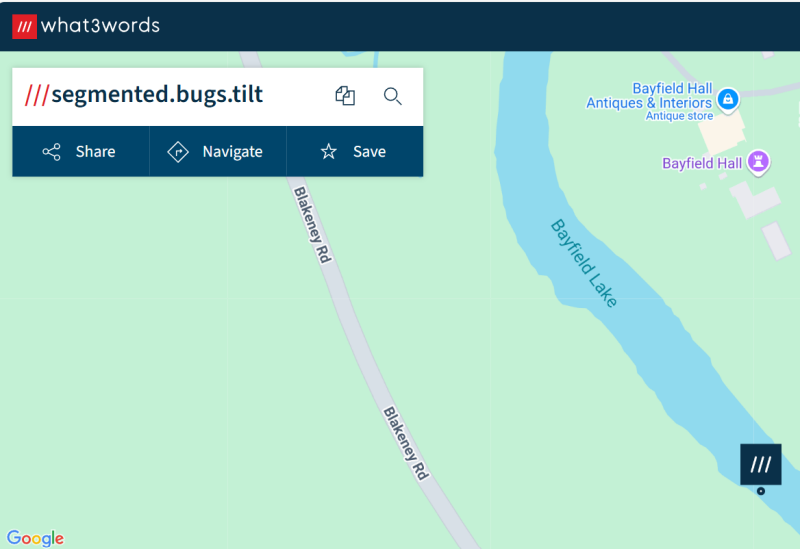
I have always been drawn to text and like to use it in my work so also 'gathered' a collection of found poetry. For this I used the What3Words app. If you are not familiar with this it is a a system that provides a precise way to identify and share locations on Earth by dividing the world into 3-meter squares and assigning each square a unique three-word combination. I find some of these 3 words combinations feel like little poems. I methodically went through the location markers in the Bayfield Hall Lake and picked out those that resonated with me in some way or brought forth an image. I chose the lake rather than the grounds as I found it interesting that these wouldn't be somewhere you would ever be likely to go.

Step 2 - Fuse
The plastic fusing is done through gentle heating using my regular domestic iron. I have looked into this and as far as I can tell the plastics are not being heated enough to release any harmful chemicals. There are other artists who use this method e.g check out this tutorial from Nerissa Cargill Thompson. However, I am not certain and I would recommend you do your own research and feel happy before continuing. Personally, I always make sure to do my fusing by an open door. If you are concerned about fumes but want to have a go, this mask (GVS - P3) protects from toxic fumes.
Make sure to look after your iron by sandwiching any plastics you are fusing between protective papers - I just use standard baking paper. I have managed to get some of the plastic on my iron (of course!) it was a bit of a pain as had to stop to clean it but it was fairly easy to remove using white vinegar and a metal scouring pad.
I use a folded towel on my table rather than my ironing board as it gives me a larger working area. I place a layer of paper, a layer of plastic, the objects I am trapping, next layer of plastic, more paper and then ready to iron. You don't have to use clear plastic or trap anything - this is the same method to use to fuse any soft plastics, it also works with crisp packets! Experiment by combining waste to create plain, patterned and even ready collaged materials.
I tend to use my iron on it's hottest setting but I think the general recommendation would be to start low and work your way up. Try gently sweeping your iron all over the area the plastic is in a few times. Then wait a few minutes for the plastic to cool before opening up the paper to check it has stuck. If not try again on a higher setting, or with a different type of plastic.


Not all plastics work! I have had most success with the slightly stretchy soft plastic you would expect to be used in packaging. Most stick together and stay but some just don't! Some bubble up, which is interesting but maybe not what you want here (this is similar to the effect you can achieve from ironing plastic drinks bottles!) All you can do is try and see what works. If the plastic is very thin I would fuse two or more layers before adding the objects.
Step 3 - Cut circles
I have used the very basic tools of an old plastic cup, a sharpie and scissors for this stage. I have got two rotary circle cutters, but the smaller one works like a compass and made too big a hole in the centre of the plastic. I found it was quicker and easier just to draw and cut round them with scissors. An easy job that can be done in front of the TV!


This is the point where they start looking good - I kept getting distracted holding my circles up to the light to see the shapes within.


Step 4 - Zigzag edges
This stage is more decorative than necessary. I decided to stitch around the edges to make the circles more secure for outdoor display in an exhibition. I experimented with a few different colours and stitches to see if I wanted something that was more subtle or stood out. As I can't control the sunlight shining through my finished piece I wanted something that would enhance the overall appearance and catch the eye. Being a lover of bright colours I decided on a machined zigzag stitch. I wanted lots of different colours and decided it didn't matter if the bobbin matched the front stitching - this was a great way to use up all the bobbins with bits of thread on from previous projects. It was also nice to get my sewing machine out as I tend towards hand stitch in most of my work.


Step 5 - Stitch it all together
I used white thread and my machines curly (?) setting to join the circles. I did this in sets of 5x5 to make the process easier. I had made so many circles, I added it all up and I had made 424, yes FOUR HUNDRED AND TWENTY-FOUR circles! As I said I don't tend to use my sewing machine much, I was extremely relieved when I got to the end and it was still working, OK I have to admit that I thanked it out loud!
I then handstitched sets of 25 together to create one large banner which I attached to a copper pipe and hung from the perfect branch in the grounds of the Bayfield Hall Estate.

Add comment
Comments